Tuesday, October 27, 2009

Workstation 7 at Last!

This has been an exciting month with the release of Windows 7, the launch of Ares1-X (pending at time of writing), and the release of Workstation 7.  VMware announced earlier today the general availability of Workstation 7 and I personally can not wait (but will) to get my hands on it.  I have to plan this right though since the trial is for 30 days.  I think I have enough email addresses to last me until I get my VCP upgraded to v4 and hopefully a new Workstation 7 license.  I'm providing a collection of information on Workstation 7.  I hope it helps and if you think something should be added then please let me know.

Here's a few reasons to buy/upgrade Workstation 7
  • Full native support for ESX(i) 4 in Workstation - Recommendations
  • Support for Windows 7 including Aero feature*
  • 3D support - DirectX 9.0c, Shader Model 3, and OpenGL 2.13D
  • Driverless Printing
  • Pause the VM to quickly and temporarily free up resources for other VMs or applications.
  • Greater VM resource options
    • 4 virtual processors or virtual cores
    • 32GB Memory per VM
  • SmartCard support
  • 256-bit AES Encryption
  • Integration with Visual Studio, Eclipse, and the SpringSource Tool Suite
    (Hoping that eventually PowerShell Plus or some other PowerShell IDE will integrate)
  • More Guest OS Support
*Aero feature requires following hardware support

  • Intel Dual Core, 2.2GHz and above or AMD Athlon 4200+ and above
  • nVidia GeForce 8800GT and above or ATI Radeon HD 2600 and above
  • At least 3GB of host system memory

Purchase Info:
  • Buy for $189
  • Upgrade from Workstation 5.x or 6.x for $99
  • Free upgrade if you purchase Workstation 6.5 between October1, 2009 and November 30, 2009.
    http://www.rebates-vmware.com/ws7upgrade/
  • Pass VCP for free license.
Release Notes
http://www.vmware.com/support/ws7/doc/releasenotes_ws7.html

Workstation 7 Documentation
http://www.vmware.com/support/pubs/ws_pubs.html

Free Online Training from VMware
http://mylearn.vmware.com/register.cfm?course=53111

Workstation FAQ page
http://www.vmware.com/products/workstation/faqs.html

 Update:
Duncan Epping beat me to a post on VMware Player 3.  Check his post out at http://www.yellow-bricks.com/2009/10/27/vmware-player-3-0/
Features are pretty comparable.

Tuesday, October 13, 2009

Who's VM is This? Custom Fields for VMs with PowerShell

Being new into an environment, it is often difficult to sort through the hundreds of new servers that are now under your care. Seasoned veterans in your organization will already have intimate knowledge about each system that they support, and more often than not it is not fully documented as to who owns what system. I find myself often asking my new coworkers..."Who's VM is This?"

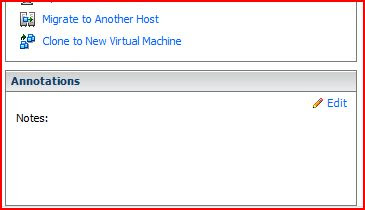
You may already know that within vCenter server you can easily add notes to VMs by selecting the VM, clicking on the Summary tab, and look under 'Annotations'.

Clicking on the Edit link will display the "Edit Custom Attributes" box where you can enter notes.


You should also see a button for creating custom Attributes. Attributes are custom fields (which is important to remember when using PowerCLI) that you can set name and values for at your pleasure. This can be applied to Hosts, Virtual Machines, or Globally which will apply the new attribute to both Host and Virtual Machine.


Note: Adding a custom attribute to one Host or Virtual Machine will add that attribute to all like systems. It does NOT populate the value for this attribute on other systems however. This is still our responsibility. Likewise if you delete an attribute it will also remove it and all values from like systems. These values are stored in the vCenter database and could possibly be recovered from your database backup. I have not tried testing this but have verified that the data is there and reference the VM in tables VPX_FIELD_DEF and VPX_FIELD_VAL.

In our environment it was my goal to create a custom attribute for "Owner", "Director", "App Owner" so that I could easily run an "Owners Report" that could be used for change notifications.

If you've read any of my other posts you probably know what's coming next...A Script!

Since there are so many VMs in my environment and I was relying on other people to populate the necessary data I created an Excel spreadsheet on a shared drive with a list of the VMs and columns for Owner, Director, App Owner, and Notes (which I'll share a separate script for later).

While that information was being populated I put together a quick script to import the file (.csv) and implement the attributes.

$import = Import-Csv "\\server\share\VM-Owner-Info.csv"

$import | %{
$field = $_.Field
$value = $_.Value
$server = Get-VM -Name $_.Name

#Create/Set custom attribute based on CSV values
$server | Set-CustomField -Name $field -Value $value
}

Note: Each new custom attribute that is added will appear at the top of the annotations section, just above the previous attribute added. i.e. If you have an attribute that you wish to have on top, then make sure you add it last.

For the sake of simplicity and under reasonable time constraints I reformatted my completed excel spreadsheet so that each Field was isolated on it's own line along with the VM and Value. This involved an extra minute but knowing Excel pretty well you should be able to accomplish this very quickly as well. My .CSV thus looks as such:

Name,Field,Value
Josh-Test-01,Owner,Josh 1
Josh-Test-02,Owner,Josh 2
JoshNet-DC,Owner,Josh 3
Josh-Test-01,Director,Jason 1
Josh-Test-02,Director,Jason 2
JoshNet-DC,Director,Jason 3
Josh-Test-01,App Owner,Rod 1
Josh-Test-02,App Owner,Rod 2
JoshNet-DC,App Owner,Rod 3


The script will process each line and assign the custom attribute accordingly. Since this serves the purpose and within the right time criteria I consider it in order. I'll be working hard later to allow you to generate an easier to manage table/CSV where the script will determine the Attribute name based on the header, and enter the value accordingly.

Host,Owner,Director,App Owner
Josh-Test-o1,Josh 1,Jason 1,Rod 1
Josh-Test-02,Josh 2, Jason 3, Rod 2
JoshNet-DC,Josh 3, Jason 3, Rod 3


This would be easier to edit and manage in Excel rather than having to define the attribute and value on each line. If anyone has some insight on how to make this possible since my initial attempt failed then please let me know.

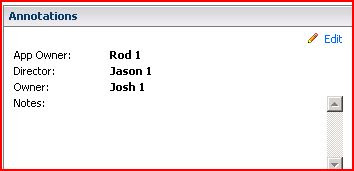
Once run, the final product appears as so on all VMs:

I can now see the Owner, Director, and App Owner for this VM. Certainly you can use whatever attributes you'd like. I highly recommend using Excel and collaborating with your team to gather the pertinent information.

Now that you have this data populated for your VMs it is only really good to you if you can get it out. The PowerCLI Blog has a post for moving this data between vCenter servers (in the DB as you recall). I have modified it slight where it will display the attributes and their values for each VM.

function Get-CustomField {
param($item)
foreach ($cf in $item.CustomFields) {
if ($cf.Value) {
$field = "" | Select Key, Value, EntityName
$field.Key = $cf.Key
$field.Value = $cf.Value
$field.EntityName = $item.Name
Write-Output $field
}
}
}
$fields = Get-VM -server $server1 | Foreach { Get-CustomField $_ }
$fields


You can also use the quick one-liner:

Get-VM | Select -ExpandProperty customfields

Hope you find this useful.

Links:
Eric Siebert on Custom Attributes - http://itknowledgeexchange.techtarget.com/virtualization-pro/using-custom-attributes-with-vcenter-server/

When researching additional information for this post I came across where Arne Fokkema also created a one-liner to populate custom attributes from a .CSV file. It seems he beat me to it by about a month and I somehow didn't find it before creating my own. Here are two links from his blog where he performs the same task as well as adding notes as I mentioned earlier.
http://ict-freak.nl/2009/08/14/powercli-add-notes-to-multiple-vms/
http://ict-freak.nl/2009/08/17/powercli-set-custom-fields/

http://blogs.vmware.com/vipowershell/2009/05/moving-custom-fields-from-one-vcenter-to-another.html

Update Service Console Memory across Environment

I recently noticed a host in my environment that had its Service Console Memory set to 272MB which is far lower than recommended but is default. Since it is possible that others in my environment are also misconfigured I decided I needed a script to change this. A quick search on the internets led me to:

http://ict-freak.nl/2009/07/17/powercli-find-and-set-the-service-console-memory-value/

In his post, Arne Fokkema demonstrates how to generate a report on Console Memory in the environment using his script:

Get-VMHost | Sort Name | Get-View | Select Name, `
@{N="Service Console Memory";E= {"" + `
[math]::round($_.Config.ConsoleReservation.ServiceConsoleReserved / 1MB, 0) + " MB "}}

Fortunately he also provided a script for modifying this setting. I have it written below with a small modification that takes advantage of PowerShell's ability to perform calculations based on unit (KB/MB/GB). Functionally it isn't any different then Arne's script, but I found it a little more user friendly.

Get-VMHost | Get-View | % {
$_.Name | Where { $_.Config.ConsoleReservation.ServiceConsoleReserved -ne (800*1mb) }
(Get-View -Id $_.ConfigManager.MemoryManager).ReconfigureServiceConsoleReservation(800*1mb) }


Thanks to Arne for his post and work. Take a look at his blog at http://ict-freak.nl/

Tuesday, October 6, 2009

NTP. PowerShell. It's About Time.

There's no doubt that time is critically important in a computing environment. Given this sensitivity, and the recent recognition that we had rogue hosts improperly configured, I decided to crank out a script that would analyze our environment. I wanted to find whether the NTPD service was running, what the NTP server configuration was, and provide a report of this. Additionally I wanted to have the option (with commenting) to automatically make corrections.


You can find the NTP settings in vCenter server by selecting the host, clicking on the Configuration Tab, and clicking on Time Configuration under Settings

Fortunately our time errors were in or Dev/QA environment and no harm was done but this led me to think "What time is it on our hosts?" Naturally my first step was PowerShell one-liner and since I'm trying to learn I wanted to start out on my own for a little while before pining for help on Google (actually I usually check Hal Rottenberg's book and Alan Renouf's blog http://www.virtu-al.net/ first).

After browsing the commands available I was able to construct this little one-liner to list the host and the running status of each host:

Get-VMHost | Select-Object Name,@{Name="NTP Running";Expression={($_ | Get-VMHostService | Where-Object {$_.key -eq "ntpd"}).Running}} | Sort-Object -Property "NTP Running"

This provided me the following output (redacted of course) showing the host name and a boolean response to whether the NTPD service is running.

Great! I see I have 5 servers that showed False for the NTPD service running. Now time to figure out how they are configured and then either configure or simply restart the service. I now needed to include the NTP server. Running on a little success with quitting time approaching, I hopped on virtu-al.net and lo and behold there was a post with exactly what I was doing. http://www.virtu-al.net/2009/08/14/powercli-do-you-have-the-time/

Adding @{N=“NTPServer“;E={$_ |Get-VMHostNtpServer}}, slightly modified into the Select-Object allowed me to see the NTP server setting as well

Get-VMHost | Select-Object Name,@{Name="NTP Server";Expression={$_ | Get-VMHostNtpServer}}, @{Name="NTP Running";Expression={($_ | Get-VMHostService | Where-Object {$_.key -eq "ntpd"}).Running}} | Sort-Object -Property "NTP Running", "NTP Server"

I immediately notice that I have a couple of hosts pointing to 127.127.1.0 which tells me for sure that things are not configured properly for some hosts in our environment and which would explain why the NTPD service is not running. The remaining servers appear to simply have the service stopped and getting that started is pretty easy with the one-liner provide by Virtu-Al.

Get-VmHostService -VMHost MyHost | Where-Object {$_.key -eq “ntpd“} | Start-VMHostService

Being a scripter the way that I am I really do not want to have to run this for each of the 4 hosts that need their service restarted so time for another script that will update all hosts involved.

I took a break and decided that I wanted a maintenance and reporting script all in one. The end result was to generate a NTP status report that exported the data to a date named CSV. This made the script a little more flexible and allowed me to run multiple steps on the resulting data while providing historical data if I need to help trace NTP problems.

The new script prompts the user (notes for automation are added) as to whether services need to be started on hosts where NTPRunning = False. To solve the other issue of incorrect or non-configured NTP server I included an If statement that checks the configured NTP server and prompts the user and requests a new NTP server/IP to change to. The top of the script provides a place to put a preconfigured value in case you wish to apply this to a maintenance plan or bulk change NTP values.

Download Script - NTP-Maintenance-Generic.txt (convert to .ps1)


--------------Full Script-----------------------------------

#This script is designed to report the status of NTPD service running in your environment by checking each host.
#You are then able to change the configuration of hosts based on old and new values.
#Also able to restart stopped services.
#You should run this script on a machine that has vSphere PowerCLI installed and as a user who has appropriate vCenter server permissions
#to manage host services and configurations.

#Add-PSSnapin VMware.VimAutomation.Core #In case you need to load the VMware snap-in

Connect-VIServer -Server server.domain.com #Enter your vCenter Server

$NtpServer = "10.10.10.10" #Provide your default NTP Server. This will be used as default so entering a NTP server when prompted is not necessary
$OldNtpServer = "10.10.10.11" #Leave set as 127.127.1.0 as default unless you wish to change settings in your environment
$DefaultNtpServer = "127.127.1.0" #NTP Server Value that is set on a fresh ESX installation.

#Location based on Date
$date = Get-Date -UFormat %Y%m%d
$ExportLocation = "C:\NTP-$date.csv"

#Location where you would like report to be saved to.
#$ExportLocation = 'C:\NTPReport.csv'

$NTPHosts = Get-VMHost | Select-Object Name,@{Name="NTPServer";Expression={$_ | Get-VMHostNtpServer}}, @{Name="NTPRunning";Expression={($_ | Get-VMHostService | Where-Object {$_.key -eq "ntpd"}).Running}} | Sort-Object -Property "NTPRunning", "NTPServer"

$NTPHosts | Export-Csv $ExportLocation -NoTypeInformation
& $ExportLocation #Opens generated report file

$Restart = Read-Host "Would you like to start NTPD services or change NTP configurations on hosts? (y/n)"
#$Restart = "y" #Comment above line and uncomment this line if you wish to automatically restart services.
If ($Restart -eq "y"){
Import-Csv $ExportLocation | % {
$vmhost = $_.Name

#Checks the NTP configuration against a value previously determined at the top of script.
If (($_.NTPServer -eq $OldNtpServer) -or ($_.NTPServer -eq $DefaultNtpServer)){
$NtpInput = Read-Host "Some servers are configured with NTP set as $OldNtpServer or $DefaultNtpServer and may need their NTP settings reconfigured. Please enter NTP Server FQDN or IP address. <$NtpServer> is default."

If ($NtpInput -ne "") {
$NtpServer = $NtpInput #Sets $NtpServer to the inputted value and does nothign if left blank. This allows use of default when value is consistent in the environment.
}
Add-VMHostNtpServer -VMHost $vmhost -NtpServer $NtpServer | Where-Object {$_.NTPServer -eq $OldNtpServer}
Remove-VMHostNtpServer -VMHost $vmhost -NtpServer $OldNtpServer
}

#Now time to restart any NTPD services that are currently not running.
If ($_.NTPRunning -eq "False") {
Get-VmHostService -VMHost $vmhost | Where-Object {$_.key -eq "ntpd"} | Start-VMHostService
}
}
}
Write-Host "Process Complete"

Video Card Hardware - vSphere 4

The boss is out this week and I got all of my work done for the day so I thought I would throw up another post that I have been working on. Blogging, and most anything else, is more difficult with a newborn in your life but I wouldn't have it any other way.

I was recently messing with vSphere in my lab environment and tweaking hardware information to determine what was new with vSphere and hardware version 7. One thing that appears to be added is the ability to edit Video Card settings. I began by adjusting the video ram to 32mb and playing with the VM. Imagine my surprise when trying to vMotion the VM and I received the error:


A
general system error occurred: Failed to write checkpoint data (offset 33558328, size 16384): Limit exceeded KB 1011971

This is apparently a result of the vRAM assigned is greater than 30MB. This can be
reduced in vSphere by:
  1. Shut down the VM
  2. Right click on the VM in the inventory and select Edit Settings
  3. Click on Video Card
  4. Change value under "Enter total video RAM" to below 30MB or select "Reserve memory for the following selection" radio button.

Given this limitation I wondered what effect that may have if you have specific hardware needs for VDI or desktops in general.

Display Resolutions at 24bit color depth

Resolution

Video Ram (MB)
24bit color

Video Ram (MB)
32bit color

2 Display
24bit color (MB)

2 Display
32bit color (MB)

800x600

1.37

1.83

5.49

7.32

1024x768

2.25

3

9

12

1280x1024

3.75

5

15

20

1600x1200

5.49

7.32

21.97

29.3

1152x864

2.85

3.8

11.39

15.19

1280x800

2.93

3.91

11.72

15.63

1440x900

3.71

4.94

14.83

19.77

1680x1050

5.05

6.73

20.18

26.91

1920x1200

6.59

8.79

26.37

35.16


Fortunately the only scenario listed here that exceeds 30MB is when running 1920x1200 on two monitors. There are more configurations available but I thought this would be high on practical limit. I sincerely doubt there will be too many people screaming for dual monitors at this resolution.


On the other side of the coin, attempting to run 16bit on lower resolutions yields the error that "The video memory is limited between 1.17 MB and 128 MB. Select different number for the monitors, screen resolution, or color depth."


Running multiple Displays requires that the Virtual Machine Version be at version 7. You can do this by Right Clicking on the guest VM and selecting "Upgrade Virtual Hardware" You will receive the following warning. Keep in mind that ESX 3.5 does not support version 7 so make the upgrade wisely.


Running multiple displays can also force you to consume more video memory causing you to exceed the 30MB limit for vMotion.


I recently posed the question to a VMware sales engineer about what effect this might have on hosts when utilizing virtual desktops and needing that additional video memory resources. He assured me that he does not know of anyone reaching a level of contention but it is something they will be investigating further. I'm open to any additional information that someone may have on the subject.

Configuring Network with PowerCLI and .CSV File

A couple of weeks ago I was in need to configure several new ESX servers with multiple NICs, vSwitches, and VLANs. Since I'm not one to do the same thing over and over again I turned to scripting. To further complicate things I wanted to allow the same script to create vSwitches, configure vMotion switch, add port groups, and create NIC Teams all from a prepopulated .CSV file. I'm doing this primarily so that all configuration could be done before the server arrived and so that I could create "Switch Profiles" when I add new hosts to clusters.

In the end I developed a script that reads from a .CSV file and then creates the desired switching. The first column tells the script what type of addition it is and the script processes the information for that object accordingly. I've noticed a few others have been posting recently about scripts on setting up portgroups, etc. and thought it was time to no longer keep this to myself (i.e. finally found the time to post). I too would like to also credit Hal Rottenburg's book Managing VMware Infrastructure with Windows Powershell which was very helpful for this and many other scripting projects I will be posting soon. Mike Laverick's post linked below helped in configuring the vMotion switch.

I hope you find this helpful. It has been HUGE in my environment.

Download the files here:
ESX-ConfigureSwitchCSV-Generic.txt
esx_switching_generic.csv

Links where others discuss switch configuration with PowerCLI.
http://halr9000.com/article/828
http://www.holy-vm.com/2009/10/01/adding-port-groups-with-powercli/
http://www.rtfm-ed.co.uk/?p=1514


Text of Script w/out comments

$getinfo = Import-Csv "\\server\share\file.csv"
Connect-VIServer -Server vCenterServer

$getinfo | % {
$Type = $_.Type #!!!! Case Sensitive !!!!!!
$gethost = Get-VMHost -Name $_.HostName
$SwitchName = $_.SwitchName
$PortGroup = $_.PortGroupName
$Nic = $_.NIC
$VLAN = $_.VLAN
$IP = $_.IP
$Subnet = $_.Subnet
$kernelGW = $_.KernelGW

If ($Type -eq "Switch") {
$gethost | New-VirtualSwitch -Name $SwitchName -Nic $Nic
}
If ($Type -ne "vMotion") {
$getswitch = Get-VirtualSwitch -VMHost $gethost -Name $SwitchName
}
If ($Type -eq "Team"){
$getswitch | Set-VirtualSwitch -Nic $Nic
}
IF ($Type -eq "Portgroup") {
$getswitch | New-VirtualPortGroup $PortGroup -VLanId $VLAN
}
IF ($Type -eq "vMotion") {

$newvswitch = New-VirtualSwitch -VMHost $gethost -Name $SwitchName -Nic $Nic
$vmotion = New-VirtualPortGroup -VirtualSwitch $newvswitch -Name $PortGroup
New-VMHostNetworkAdapter -VMHost $gethost -PortGroup $PortGroup -VirtualSwitch $newvswitch -IP $IP -SubnetMask $subnet -VMotionEnabled: $true

$vmhostnetwork = get-vmhostnetwork $gethost
set-vmhostnetwork -network $vmhostnetwork -vmkernelgateway $kernelGW
}
}

Tuesday, September 22, 2009

Hmm...We need to reorganize our clusters

This isn't first time that growth has yielded a desire to repurpose or rename a cluster in my virtual environment (VI3.5 currently), but this is the first time I was determined to use Powershell to perform the task.

The goal? I need 2 clusters in an organization folder named "Production" of our Raleigh Datacenter with the names "Windows Cluster" and "Production Cluster". I already have a "Production Cluster" that is getting repurposed in the near future so it must be renamed. I will then need to create a new cluster and name it "Production Cluster" for our new production servers.

1. Log into PowrCLI and connected to my vCenter server with

Connect-VIServer -Server

2. Change the name of the current cluster "Production Cluster" to "Windows Cluster":

Get-Cluster
-Name "Production Cluster" | Set-Cluster -Name "Windows Cluster"

This requires user acceptance of the change. Just hit enter or type Y and enter to accept.

3. Create new cluster Named "Production Cluster" and enable DRS, HA, make DRS Fully Automatic, and set HA so that it will not power on VM if it will exceed resource availability limits.

Get-Datacenter -Name "Raleigh Datacenter" | Get-Folder -Name "Production" | New-Cluster -Name "Production Cluster" -DrsEnabled -HAEnabled -DrsAutomationLevel FullyAutomated -HAAdmissionControlEnabled

Hit enter and in a couple of moments you have a brand new Cluster named "Production Cluster" in the correct Datacenter and Organization folder with DRS and HA initially configured. Always a good idea to check your configurations, but all looked well.

Note: vSphere (ESX4) has additional features (VM Monitor and fully supported Power Management) to manage on your cluster. I will update this post once I get some testing on that environment.

Friday, September 4, 2009

Dying Datacenter?? Not likely folks.

The virtualization world is going nuts talking about cloud computing and how it is going to destroy the datacenter. The possibilities are intriguing but I'm pretty sure that it could easily be a decade before people think of the cloud the same way that they look at virtualization in genenral.

I just came across this scream stream at FierceCIO.com simply mentioning the possiblity and with nothing to truly back it other than a slightly obscure report from UC Berkeley. This is certainly premature and I seriously doubt that too many CIOs and CTOs are going to ever feel very comfortable handing their datacenter over to a 3rd party regardless of the cost savings. I'm still waiting to see the Fax machine and paper disappear from the corporate world. We will continue to hold onto corporate datacenters for the same reasons. On the same note, even in the cloud your servers will be in a datacenter... Just someone else's. Read the article and my response below.

Article
http://www.fiercecio.com/story/will-cloud-kill-data-center/


My Comment:
I'd say it is premature to say that the cloud is going to kill the datacenter. What I expect we will see are some organizations taking advantage of this, primarily those who need space and have already consolidated into a virtual (VMware) environment. The cloud services as mentioned here would then allow them to upload their existing application servers that they feel comfortable with having offsite, and comfortable meeting SLAs. The corporate datacenter will go away about the same time that fax machines and paper will go away. People like things that they can touch. It makes these things more tangible and comforting when you can open the door and see the lights and hear the fans. Semantics can come to play and we can say that having servers off-site isn't part of the "traditional" datacenter, but let's check back in 3-5 years and see where this has gone. My bet is that the cloud will be used like storage rental facilities; great for when you're moving or you just need a little extra space.

Tuesday, August 25, 2009

vSphere - OVF URL Issue (Am I Just Demanding?)

OK, so I haven't posted in a while and I apologize. I'll catch you up by saying that in June 2009 I took a contract position as a VMware Engineer over at CARQUEST Technology and it has been enjoyable thus far. That being said I'm hoping to get a few more posts over the coming weeks on vSphere and other technologies I am working with, such as the IBM XIV storage system.

Earlier today I logged into my vCenter 4 server to import the vSphere Management Assistant (vMA). I typed the web address... "www.vmware.com/go/importvma/vma4.ovf" and received the following error:
"An error occurred while reading the URL: Invalid URI: the format of the URI could not be determined."

To be fair I did not type in http:// as listed on the vMA site but it was disappointing to me that with all the investment that they put into making vSphere fantastic they failed to inlude a simple "IF" statement to check what the inputted string started with and add an HTTP:// if needed.

I then corrected my "error" and included the http:// and received yet another error:
"An error occurred while reading the URL: The remote server returned an error: (407) Proxy Authentication Required."

I am now 0-2 on trying to quickly add an appliance. A quick Google and VMware community search led to only one way to work around this by running the ovftool in the command line

ovftool --proxy=user:pass@proxy.example.com http://external-site.com/ovf/package.ovf

--P.22 of http://www.vmware.com/support/developer/ovf/ovf10/ovftool_10_userguide.pdf--

It seems to me that there should be some way to input the proxy settings either from the environment or through vCenter Server. I can see where there may be some disconnect since the ovftool is separate but this really makes it difficult for me to download appliances as easily as I should in order to best take advantage of OVF based appliances and the VMware Marketplace.

Browsing through the file system led me to a module.properties file under directory "C:\Program Files (x86)\VMware\Infrastructure\tomcat\webapps\ui\jslib-1.0.160852\modules\com.vmware.webaccess.ovf_1.0.0" in 64bit Server 2008 that contained tons of information but no presence of the word "proxy". Perhaps there is a line that can be injected on this or another settings file to eliminate the need to use command line ovftool in order to authenticate against our proxy server. I'll keep digging and update this post if I find another means to access appliances through our Proxy.


One last quick disappointing note: If you bookmark the vMA page you'll notice that the header has Assistant spelled incorrectly with an 'e' instead of the appropriate 'a'. I think in the end I'm disappointed that this appliance and mechanism for deployment isn't more polished like so many other VMware released items. In the end I've had to download the .zip to import the appliance. Not as slick and easy as it was intended to be.

Thursday, March 12, 2009

USB in ESX - How?

Since we brought it up and since I feel like a slacker for not posting in several weeks I thought I'd share my experience on managing USB devices in an ESX environment. In my previous post I mentioned a posting about connecting USB devices to ESX hosts and the many different ways for doing that in both a temporary and permanent fashion. I've never had much need for temporary connection but for a rock solid permanent solution I highly recommend AnywhereUSB by Digi - website.

Priced at just a couple of hundred dollars you are able to assign one of these an IP (or DHCP which I don't recommend), install the supplied software on your guest VM, plug in your USB device and you're up and running. Ok, so in all honesty here are some gotchas and other things to keep in mind:

1. One AnywhereUSB device to one operating system at a time. You can mix and match between physical and virtual as long as they have the provided client and drivers but only one server can talk to one of these guys at a time. This also means that even though it has 5 USB ports in it you can not map them to individual servers. Hopefully someone from Digi will correct me on this but that's just the way it is.

2. Give it a static IP. It makes it so much easier to track it down and to keep track of which one is which. If you purchase multiples of these you had better label the unit as well. You'll thank me for this one.

3. Follow the instructions for installation. I know you're gitty to have this device but if you skip a step you'll be sorry. Refer to #5.

4. Just because you have a gigabit network, you're limited to the speed of the AnywhereUSB device. I vaguely recall seeing that you may get USB2 speeds of 400mbps but I have not seen that as the case in production. If you have a 100Mb network then you know what your cap is already regardless.

5. Make sure you load the Windows generic drivers on your guest VM. ESX does not present USB to the VM, and you're not adding it to your VM's settings unless you've been doing some unsupported hacking, so the generic drivers were not installed when your OS was installed. In order to do this you'll need to copy the usbd.sy_ file from the \I386 directory of the Windows CD to the \system32\drivers directory and CHANGE THE FILE EXTENSION to usbd.sys. Reboot and then install the software. If you miss this step you'll be sorry.

6. I found it quite refreshing the first time I installed one of these guys and had the presence of mind to try it out first on a test server a snapshot before taking the first step. Always a good practice when installing something new for the first time.

7. You have to reboot at least once to use an AnywhereUSB device. That should be all though. Refer to #5

If you've kept these things in mind and follow the instructions you'll have many happy years of giving your VMs access to critical USB devices without unsupported hacking or sacrificing VMotion.


Links
Original Post - VMETC.Com
http://vmetc.com/2009/03/11/connecting-a-usb-device-to-an-esx-hosted-vm/

Digi - AnywhereUSB Website
http://www.digi.com/pdf/wp_ESXServer_AnywhereUSB.pdf

USB in ESX - Why Not?

I was recently talking with a friend about the beauty of USB devices in Workstation and we quickly began talking about the difficulties of USB devices in ESX. This is a problem I had already tackled some years ago with AnywhereUSB but earlier this evening I found a post discussing USB connectivity to an ESX hosted VM and felt it time to talk about it with you.

http://vmetc.com/2009/03/11/connecting-a-usb-device-to-an-esx-hosted-vm/

In the post the author describes several means for connecting USB devices in both temporary and permanent scenarios. I personally have never had much need for one time connectivity but since many of our applications require USB dongles for their license managers it's safe to say that connecting through the host or through RDP just won't do as a permanent solution. This is especially true as virtualization continues to branch out into the desktop arena where USB devices are more than just a pretty face, they're often a non-negotiable requirement.

While the post was extremely helpful one of the items that I feel the author failed to discuss is why VMware would continue to not support USB connectivity to guest VMs from their ESX hosts. Why wouldn't they indeed?

My immediate belief is that like most things it is for our own protection. Just imagine how upset your management, or you if you are the management, would be if DRS did not properly balance your resources, HA did not restart your server upon a failure, or you were not able to put a machine into maintenance mode due to a USB device preventing Vmotion because of a device associated to a single host. I know I wouldn't want to tell the boss that the thousands of dollars I fought hard for to purchase these features were all done in because of a USB dongle. Note: I have not yet tested this scenario but it seems reasonable given the results I've seen from having VMDKs and ISOs on local storage.

The greatest strength of VMware over its competitors is that they control the hardware and control the drivers that the VMs see. They have worked hard on their hypervisor to make these features available and I'm pretty sure that they won't open their arms to USB devices on the host anytime soon. After all, there are clearly many different options out there that solve this issue. Where's the benefit in complicating their already growing datacenter OS further?

Tuesday, January 20, 2009

Devices (Toys) I Love

I spent some time today upgrading some software and drivers and felt like lightening the mood a little and talk about a couple of "toys" that I use on a regular basis. I wouldn't say that the information here is super informative so much as a testimonial.

Wireless Headphones
Staying on top of the latest technologies requires absorbing material from the variety of mediums at which folks are publishing information. Videos, podcasts and flash tutorials supplement the many blogs and white papers but can be more disruptive to people around me. Headphones are the natural solution but I have found that those pesky wires are always getting in the way when at the gym or wanting to get up for a drink refill.

Imagine my elation when I came across the Motorola S9 ROKR wireless bluetooth stereo headphones. I first saw them at Best Buy and found the original $150 price tag way too hard to swallow. Once I convinced myself that this was something that would certainly make my life just a little bit better I was on the prowl for a deal. As usual, NewEgg.com delivered and $50 later I was the proud owner of some NCSU Red ROKRs.

The S9 ROKR uses Stereo Bluetooth 2.0 and provides what I consider excellent sound quality for what I was asking from them. I found them extremely comfortable but this too is definitely a matter of taste. The best part? They have built in microphone for managing calls when using a cell phone or use with Skype. I later found out, to my chagrin, that my BlackBerry Pearl does not support Bluetooth 2.0. Naturally my wife's Pink Motorola RAZR connected right away and worked like a dream, but she cares little about these things thus far.

My primary use of the S9 ROKR is with my laptop. I love charging up the battery before traveling and playing whatever media I choose without the fuss of wires. It also comes in handy when I want to watch some training videos and not disturb anyone with the geeky information. I'm able to lean back, move around, grab a snack or refill and simply enjoy life without wires. Since I'm not really interested in walking around the gym with my wife's pink RAZR I'm just going to wait for a new BlackBerry before I get to use them the way I want but I definitely see years of happy use with this rechargeable wireless wonder.

Can you See me? WebCam
The other little wonder that I have found myself loving is my Logitech QuickCam Deluxe for Notebooks webcam. This past fall my mom and sister decided it was time for new computers so I pulled some strings, got them some great deals from the good folks at Dell, and purchased them some webcams for Christmas. The plan was to provide my mom the ability to see her kids and grandkids (coming 2009) without leaving her living room. I set them both up with Skype accounts, configured their webcams and showed them how to use them.

Setup with Skype was a cinch and I found the resolution great for the web at 640x480. The webcam simply clips nicely on my laptop monitor and came with a fantastic little carrying case for my laptop bag. The built in software provides some fun little "effects" but not something I've found much use for. My only disappointment that I've had is the inability to easily use it with my desktop system, but I bought a NOTEBOOK webcam so no complaints there.

My mom loves being able to communicate this way to stay in touch so mission accomplished. I'm sure I'll get some business use for it soon as we roll out new features with our new phone system upgrade, especially if it's going to continue to snow like it did today. Stay warm and take care.

Thursday, January 8, 2009

Death by Snapshot

One of the greatest features in VMware's many virtualization technologies is the ability to take snapshots of virtual machines while they are powered on. Put simply, VMware snapshots save the system state of the virtual machine providing a restore point. This technology is available and works very well on a variety of VMware platforms including Workstation, Server, and ESX. Unfortunately this feature carries it's own risk to the performance and stability of your environment. In this entry I will discuss the destructive event of a snapshot consuming remaining available space on a datastore.


Recovery Outline at End of post


How snapshots work

In preparing for this entry I came across an extremely helpful post by Eric Siebert where he very clearly explains the many aspects of snapshots and how they work. I'll summarize a few important points in this section but highly recommend reading his full post.


Snapshots can be initiated and managed by either the VI Client or through the command line and once initiated, the snapshot makes the base VMDK read only and writes all changes to a new file. Each new differential (delta) file begins at 16MB and grows at 16MB increments as changes are made to the VM but naturally can not exceed the size of the original base file. These files will continue to grow until the snapshot is reverted (the changes are applied back to the base VMDK) or disk space is depleted, which makes for a stressful afternoon if this happens.


Drive space is gone!

I have seen it happen several times. Someone, or something, initiates a snapshot in your ESX environment and forgets to remove that snapshot when they have completed their task. My personal experience has found that this typically becomes a problem when backup software uses snapshots and the snapshot isn't merged back. Snapshot usage in this manner is common for backing up VMs since it allows the full disk to be placed in a read-only state so that the copy can continue without interrupting the machine's ability to operate.


A live snapshot delta file for most VMs will not likely grow very quickly, except for servers with higher amounts of disk I/O such as Exchange, SQL, or File shares (especially when using Windows Volume Shadow Copy). If a growing snapshot file isn't discovered and either applied or reverted then the snapshot could consume the remaining available storage. Once this happens the VM with the applied snapshot can no longer write its changes to the delta file causing the server to stop. Additionally, any other VMs writing to the filled datastore will also be forced to shut down. Fortunately any virtual machines on the datastore without snapshots, or an active swap file, will continue to run.


Note: If you are dealing with a single snapshot then no additional space is required to commit that snapshot to the original VMDK file, but I personally feel better when I have some extra room to move.


Make Room

If you are like me and have storage claustrophobia you want to make some room on your datastore. If the VM is a critical server it would be advisable to move another VM to a different datastore so that the afflicted VM can be restarted quicker and reduce any risks from trying to move a VM with a snapshot. I've seen mixed information about migrating with snapshots and it's feasibility. I'll leave it to the reader in their own situation but my suggestion is to play it safe and move another system without running snapshots.


Storage Vmotion immediately comes to mind for this situation. Unfortunately as Chad Sakac clearly explains in his blog post, Storage Vmotion requires creating a snapshot in order to operate. Consequently, with no drive space, we're left with the horrid task of intentionally taking down a server to make room. In my situation we took down our intranet server since it was one of the smaller servers, would take the least amount of time to migrate, and would cause the least impact on employee productivity. The time to complete this task will depend on several factors, specifically in regards to the type and speed of storage that you are using. This process took about 15 minutes for us to migrate our server to a new datastore.


Apply Snapshots

Once drive space has been created you should be allowed to start up the VM and commit the snapshots. Don't forget to turn the migrated server back on!


I have yet to receive a consensus on whether applying the snapshot on a live machine is better than leaving it powered off, but if the server in question is a main production box then it may be worth giving it a shot. You can expect that the process will take longer on a live machine. It will certainly be performing better than it was a few minutes ago!


Applying the snapshots can be a long grueling ordeal depending on the amount of space you have consumed. Be patient and do not be surprised if you see your task timeout in the VI client. VirtualCenter will timeout any task at 15 minutes but your process will still be running. Check to see if your process is complete by keeping an eye on the datastore browser in the VI client. You will be looking to see that the delta files are no longer there and you will also note that there is storage available in your datastore again. You may need to hit refresh occasionally in order to witness the disappearing files.


Our environment provided us with over 70GB of snapshot files over the course of 3 days time which took approximately 90 minutes to apply. Eric Siebert speaks to this in the second part of his snapshot post where he states that "A 100 GB snapshot can take 3-6 hours to merge back into the original disk." Suffice it to say that the larger the snapshot the longer it will take, and the more storage "cushion" you have on the datastore, the greater your risk for a long wait.


Recovery

Once the snapshots have merged back into the original file you can get the VM back up and running (if you haven't done so already) and then Storage Vmotion the server you moved previously if that is available in your environment.


Prevention

Vmware does not provide any tools natively for monitoring active snapshots in your ESX environment. Third-party applications are available to help automate the process of finding these active snapshots. I have not personally used them yet but Jason Boche mentions a few of them in his blog where he briefly displays Xtravirt Snaphunter, RVTools, and hyper9.


I will probably get my hands on a couple of these in the coming weeks and will certainly provide some posts. If you are in a fix to get some monitoring on your snapshots it looks as though SnapHunter can notify you via email when you have snapshots or even commit them if you so choose.


If you want to go low tech and only manage a few machines, you can check for snapshots by looking in the VI client or keeping an eye out for delta files in the datastore browser. Be vigilant regardless of your method for tracking active snapshots. It certainly doesn’t look good to the bosses when your highly robust ESX environment fails your company, especially when it can be easily prevented.


Despite the agony that can be caused by an unchecked snapshot, Vmware's snapshot feature is a true saving grace for the administrator and should be used without too much trepidation. The ability to apply a patch, test a deployment, or change a configuration and then quickly revert the system is more than I'd be willing to give up. Just keep your eyes open to the snapshots that are out there and everything should run smoothly and optimally, which the bosses definitely appreciate.


Recovery Outline

  1. Identify the server(s) affected and determine priority on bringing them back online.
  2. Shutdown and cold migrate another virtual machine from the filled datastore to a new location. Not always necessary if you have only a single snapshot since applying a single snapshot requires no disk space.
  3. Apply snapshots to the affected server. You may power on server if you prefer but this will have an adverse effect on performance and cause this step to take longer.
  4. Be patient. A 100GB snapshot could take 3-6 hours to commit. VirtualCenter will timeout your task after 15 minutes so don't panic.
  5. Monitor the Datastore Browser in the VI client and wait for the delta file(s) to disappear. You will likely need to refresh occasionally which may take a moment to process each time.
  6. Once the snapshot is committed you can safely turn on the VM (if you haven't already) and hopefully breathe a sigh of relief.
  7. Play it safe and set up a system of monitoring your VMs for active snapshots through either an automated software like SnapHunter from Xtravirt or simply monitoring for delta files in the datastore browser